
No cold temperature control? No problem. These yeast strains and techniques will have you making very clean beer in a short period of time without special cooling equipment.
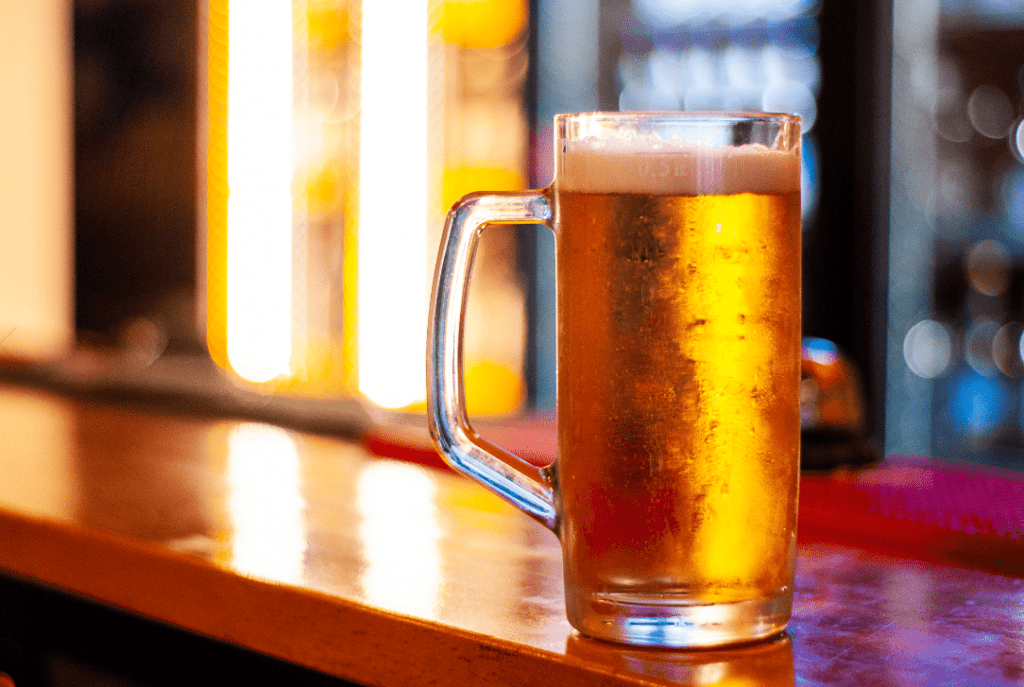
In many corners of lager brewing groups, you’ll find that some of the most experienced and heralded brewers will swear by low temperatures and a great deal of time as two of the primary reasons that their lager beers are so good. These are the methods I often use myself, but what if you don’t want to wait 10+ weeks to drink a good homebrewed lager? What if you don’t have the ability to keep your beer at low temps for weeks upon weeks? If you follow some of the practices and strategies below, you can make fast and warm lager or lager-like beer that is indistinguishable to many drinkers, even some very experienced ones. And you can do it in under half the time.
Understanding Your Environment
The first thing that you need to do is understand what type of fermentation environment you have to work with. It’s helpful to have a digital thermometer that you can place in areas around your house in the days prior to brewing, to give you a good idea of the temperatures you can expect if you were to ferment in those areas.
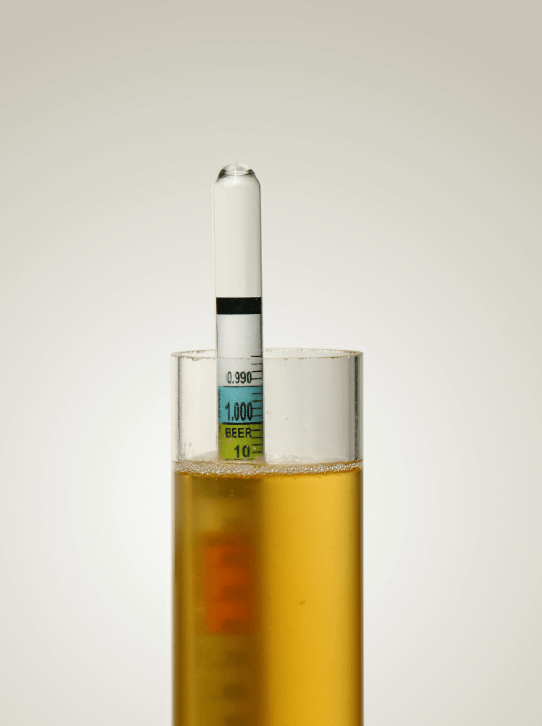
Keep in mind that the ambient temperature of a room is not always going to be the same as the internal temperature of the beer. During peak fermentation, or high krausen, the internal temperature of your beer might be 5-10°F/3-6°C higher than the ambient temperature of the space. Once fermentation is complete, the ambient and internal beer temperatures should be the same though. Planning for these temperature swings may take a little bit of time and thought, but it will often end up giving you much better results. You can use a fish tank sticker on the side of your fermentation vessel to give you a good idea of the internal temperature of the beer. A thermowell is a superior, albeit more expensive choice. And finally, a Tilt Hydrometer is the most expensive, but highest tech solution, allowing you to see gravity and temperature estimates in real time with the benefits of wireless technology.
Raising Temps
If you have a heating pad or garden seed heating mat, you can wrap them around your fermenter. This allows you to raise the temperature when using kveik like fermentation strategies, or if you’re going to ferment in a colder basement or crawlspace that needs to be heated up a bit.
An alternative to the heating pad or mat is to utilize different areas of your living quarters to raise and lower the temperature of the beer. For example, if you are pitching your yeast into the wort and you want to target around 66°F/19°C, you will want to start fermentation out in a colder (often lower) area of the house, one that is closer to 61°F/16°C, as the beer will be warmer than the room temperature when fermenting. Once activity has slowed down and the internal temperature of the beer has decreased, you can move the beer into a warmer area of the house, closer to or even higher than your primary target temperature, allowing the beer to finish fermenting the last bit of alcohol and clean up any off flavors. Closets often maintain temperatures around the clock during certain seasons, as can basements and crawl spaces. Uninsulated or hot climate garages, as well as attics are often poorer choices, as they can swing in temperature quite a bit overnight. Though if you live in a colder climate, a garage can actually be a fantastic place for cold crashing/clearing up a beer post-fermentation. We’ll touch more on that later on in this article.
Lowering Temps
Lowering temps without the benefit of a dedicated fermentation chamber can be trickier, and the best alternative that I’ve found is to find the coolest space in your living space and utilize that for fermentation. However, if you need to get even lower, putting the fermentation vessel inside of a wider, shallower bucket or bin, filling that bucket or bin with cold water and monitoring the internal temperature of the beer while making adjustments to that outer layer of water is an effective strategy. This strategy is very labor intensive though, it requires keeping a close eye on the temperature and making sure you adjust with ice or fresh cold water regularly. But if you don’t have the space for a temperature controlled fermentation fridge or the funds for a direct glycol or brewjacket immersion system, this can be a reliable solution for lowering your fermentation temperature.
Yeasts and Strategies for Warm, Clean Fermentation
Now that you have an idea of where and how you’ll ferment your beer, take a look at these yeast strains to see what options might best fit your specific setup.
Lager Yeast at Warm Temps – If your goal is to make lager-like beer in a faster amount of time and/or at warmer temperatures, look no further than… lager yeast. Strains such as the Fermentis 34/70 (liquid equivalents are WLP830, WY2124, L13 and OYL106) provide very clean fermentations at and even above 60°F/15.5°C. As a bonus, the beer will be fermented and ready to drink a fair bit faster (within a few weeks) than it would be at lower temps (5+ weeks often). This is a good and reliable choice if you can keep the internal temperature of the beer below 65°F/18°C.
Kveik Yeasts – If your fermentation areas trend hotter (higher than 70°F/21°C) or you want results even faster (about two weeks), you may want to look towards the Norwegian kweik yeasts. While these yeasts were not traditionally used to brew clean beer, several strains are naturally clean and several yeast labs around the world have further isolated these clean strains to specifically brew clean, lager-like beers. Here are three of my favorite:
Oslo
I really like this strain in the 80-85°F/27-29°C range. I’ve reached over 80% attenuation with this strain, perfect for giving you a crisp, clean taste that is the trademark of many pale lagers. I’ve had really clean results and a quality beer ready within 14 days. Both Propagate Yeast Labs and Bootleg Biology sell good quality versions of Oslo.

KRISPY
I’ve only brewed with this strain once, but the results were very similar to Oslo. I fermented a little lower, 70-75°F/21-24°C and had a delicious psuedo German Pils ready in about 17 days. There was a very feint trace of orange fruit ester in this beer, but it faded out by the end of week three. This strain comes from Escarpment Labs and many Canadian breweries are using it to make psuedo lager beer.
Lutra
I’ve used this yeast a handful of times. It can go all the way from 70°F/21°C to over 87°F/30°C, making this perhaps the best choice if your only options for fermentation are very warm areas. I have found that this yeast gives off some lemon and lime flavor, it is subtle, but I almost always taste it in my homebrewed versions and in commercial versions. It is very clean otherwise, certainly cleaner than any traditional ale strains I’ve tasted, but not quite as clean as the two above. Omega makes this yeast strain and they are very responsive to questions about using it.
With all three of the above yeast strains, use yeast nutrient (one with Diammonium Phosphate or DAP in it) and be very aware of temperature drops, these strains tend to go to sleep if the temperature drops. The kveik yeast will ferment your beer to near completion very quickly, sometimes within 24 hours, and that speed produces a lot of heat, heat that will disappear quickly towards the end of fermentation. Raising the ambient temperature that the fermenter is in by 5-10°F/3-6°C as activity in the fermenter slows down is a key way to ensure that the temps do not drop, helping you achieve full attenuation with these yeasts. The yeast stalling is the number one issue I’ve seen in the Kveik Facebook Group for failed lager attempts.
Ale Yeast Options – Kolsch and alt yeast can be clean and work well at warmer temperatures. I would rather use lager yeast at warmer temperatures or kveik yeast, I believe they give better results, but there may be a situation where you have kolsch and alt yeast on hand that you’d like to use. Chico yeast (US05, WLP001, WY1056) is clean by ale standards and for beers like IPAs, pale ales and even amber ales, it will come across very neutral. But for lager-like beer, I find that it has too much noticeable fruit. Even at lower temperatures, it throws off a fairly prominent peach ester. Nevertheless, if this is your house yeast, feel free to give it a try around 60°F/15.5°C and see how it goes.
Recipe Tips
With most of these yeasts, I’d simply take your favorite lager recipe and substitute the yeast and fermentation temperatures as described above. However, there are a few modifications that I’d suggest making in specific situations:
- With kveik yeast, I find that the hops can sometimes be masked. Raising the IBUs of your recipe by around 10% is a good starting point, and adjusting based on the results.
- Using hoppier lager recipes in general will help take the burden off of the yeast. Pilsners, particularly hoppy American pilsners, New Zealand and Italian pilsners contain plenty of hop bitterness and flavor that will help cover up any subtle differences in your warmer fermented yeast profile compared to the low and slow traditional methods.
- If you don’t want to go hoppier, you might consider going bigger. Doppelbock, Baltic Porter and other large, maltier beers can be a great choice for the same reason as my suggested use of going hoppy above. Those big, bold malt flavors will be the focus of the beer, and a little bit of difference in the yeast profile is not as likely to be picked up by most tasters.
Pressure Fermentation
One way that I’ve found to really help make clean beers at higher temperatures is to ferment under pressure. This tends to suppress esters and result in a cleaner final product. It has the bonus of helping carbonate the beer sooner, transfers with little-to no oxygen pickup, and if you allow fermentation to naturally carbonate the beer, you will end up with tighter bubbles and an ever-so slightly softer taste.
I personally use corny kegs and a spunding valve to ferment with. I suggest setting the spunding valve to 7-15 PSI and allowing the fermentation to naturally carbonate the beer. However, if you have a larger budget, many of today’s premium fermentation vessels allow for pressure fermentation.
Cold Access
Now I know that this article is about alternatives to cold fermentation, but if you do have some access to a cold space, a little bit of cooling can go a very long way into helping clean these beers up.
- If you have a cold garage in the winter, placing your fermenter or kegged beer in that garage, particularly with gelatin or biofine, can really help clear that beer up prior to consumption. Three to seven days is effective, and the closer you are to freezing temperatures the shorter length of time you’ll need.
- If you bottle your beer and your only cold area is a fridge, place the bottles in the fridge for a few days before consumption and make sure that you pour carefully, you should get a clearer final product in the glass (*just make sure to allow the beer to fully carbonate at warm temperatures before doing this if you are bottle conditioning).
Speed
In plenty of corners of the internet you’ll find people discussing lagers that they’ve made at warm temperatures, often under pressure and/or with kveik yeast that was ready in seven days or less. While you can fully ferment and carbonate a beer with some of the strains I mentioned in that time period, I haven’t found lager-like results in any less than 14 days from brewday to glass. That doesn’t mean it’s not possible, I just haven’t experienced it in the many beers I’ve brewed with the methods above, nor in the variety of homebrewed and commercial beers made with these techniques that I’ve had a chance to sample. I encourage you to taste along the way and determine the right amount of time for your palate, with your equipment and techniques.
Final Thoughts
While my regular house German pils takes over seven weeks from grain to glass and never gets above 50°F/10°C, I enjoy making alternative psuedo lagers from time to time. They’re usually a bit hoppier than my house pils, particularly in flavor, but I get great results in a fraction of the time. Plenty of self-anointed purists will scoff at the idea of a lager-like beer in only two weeks, but be confident in your processes and see the results for yourself. After all, the only people that matter are the ones that are drinking it. And when very good breweries have had success with some of the techniques listed in this article, you know that there is more than one path to success in making these beers.
There are a lot of different strains, temperature ranges and techniques covered in this article. If you have any questions, feel free to drop a line below, I receive notifications for any comments directly in my inbox and will be happy to respond. Cheers!
Terrific article. I like that you took the time for a full spectrum explanation of the benefits and advantages of cold at the end of warm fermenting (including waiting for secondary ferment before largering in bottle). I think you undersell the turn around times for kveik though. I’ve run Voss at 35c (specifically chasing orange esters) and it took a 1.044 wort to 1.010 in less than 23 hours. I was patient with a 3 day dry hop and I bottle fermented and was drinking a carbonated pale ale 9 days after pitching. I’m keen to repeat this beer but this time ferment under pressure.
Thanks a lot, I appreciate the comments. With something like a pale ale and/or Voss yeast (and those trademark orange marmalade type esters), I think you’re spot-on for a faster turnaround time. In my experience with pale lagers and kveik yeast, though, I’ve seen a lot of benefit in getting closer to that 14 day mark. I think with beers like pilsners, especially noble hopped ones, they’re a little more delicate than American or even English hopped pale ales, and they need to reach a cleaner ester level before they taste pretty good.
I do actually remember a kveik hornindal IPA that I made where I dry hopped in the primary. It was fermented under pressure and tasted great around day 10-12 I believe. The nice thing about using kveik with the hoppier ales is that they seem to clean up the green flavors of the beer a lot faster than traditional ale yeast (like chico or English yeasts). A lot of solid craft breweries out here in Colorado are using strains such as Oslo, hornindal or even voss for IPAs with some terrific results. This article was more focused on the lager turnaround times though, and I still may be underselling a wee bit too haha. Cheers!