
What the title says. Yeah, I understand that some of these points may be controversial. And that you don’t need to know all these things to make good beer. However, however you slice it, it possible to brew a ton of batches and be an “advanced” home brewer, and still not know these things or fall prey to these errors.
1. Falling Prey to a Rookie Wort Gravity Error
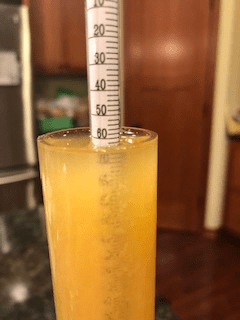
Uneven mixing of all-grain wort, especially when batch sparging, can lead to incorrect pre-boil gravity readings
Beginner brewers quickly learn that partial-boil extract worts can give false specific gravity readings due to the near-impossibility of thoroughly mixing chilled wort with top-off water. The wort ends up being non-homogenous. However, many brewers do not consider that wort in the kettle from sparged mashes can be poorly mixed as well, causing them to get a bad gravity reading. The less dense second runnings can form a separate layer than the denser first runnings. This is especially true for batch sparged batches. Fortunately, the fix is as easy as stirring the pre-boil wort thoroughly. Unlike concentrated extract wort and plain water, the two gyles of wort are at similar temperatures and density and mix well.
2. Terminal Gravity: Getting on the Train without Knowing the Final Destination
A forced fermentation test is an essential tool for determining the true terminal gravity of high gravity beers and unfamiliar recipes
A lot of things can go wrong on a big beer. Unless a brewer specializes in big beer, they are doing things that is outside of the usual for them, so it’s hard to predict final gravity. Things like mashing an unfamiliarly large amount of grist and using a higher proportion of ingredients with low or unpredictable fermentability. Or struggling to pitch a sufficiently huge amount of yeast. Maybe they even supplemented their wort with extract of unknown fermentability under these conditions.
With big beers being prone to getting “stuck”, it’s hard to tell if a high and stable gravity indicates a stalled fermentation.
Advanced brewers should be running forced fermentation tests on their worts in parallel to the main fermentation in order to derive the true terminal gravity of their wort. Knowing the limit of attenuation gives the brewer comfort in setting a final gravity target and determining if a high finishing gravity is right for this big beer or needs them to intervene.
3. Off Flavors: Not Knowing Which Side is Buttered
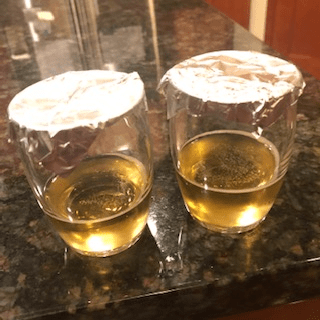
A forced diacetyl test is a great tool, but only if performed correctly
No one likes off-style butter flavor in their beer. A forced diacetyl test will help you pick up on diacetyl or its precursor (alpha acetolactate) that is not obvious at the end of fermentation. The three biggest mistakes I see are:
- Microwaving the samples. Yeah, I know numerous credible sources tell you to microwave the samples, but using a microwave tends to flash off the diacetyl, making it disappear and giving you false confidence. Instead, heat the samples in a water bath. If you don’t have a sous vide machine, setting up a water bath can be as simple as using a bucket of hot water and an Inkbird ITC-308 or other external temp controller to control a crock pot, hot pot, or Instant Pot.
- Not covering the samples. If the point of the test is to smell volatile aromas, it should be obvious that the samples should be covered. If you don’t have flasks with screw lids (mason jars), you can cover your samples with plastic wrap.
- Smelling the samples hot. While this is not a fatal flaw, in a hot samples the diacetyl that may be perceptible in finished beer may get overwhelmed by other volatilized chemicals, especially by ethanol. It’s better to cool the samples back down to room temperature before smelling them. Just set them on the counter and walk away for a while.
4. Sanitizers: “Impatience is a Great Obstacle to Success”
Or so said Napolean Bonaparte. Being impatient with sanitizer can come back to bite you.
Advanced brewers have learned the trick of mixing no-rinse sanitizer with distilled or RO water and putting it in a spray bottle. But the ease and convenience of this solution can cause brewers to skip a step – the minimum contact time that a sanitizer needs (30-second for Star San and 2 minutes for iodophor). It’s all too easy to spray a stir spoon or thermometer probe with sanitizer and then just stick it in. Of course, you are only cheating yourself. The next time you find yourself being impatient, count off the time before that device touches your beer or wort. You may be surprised at how much you’ve been cutting this corner!
5. Yeast: Sending a Squadron When an Army is Needed
Not pitching enough yeast is something far too many homebrewers get wrong.
As a rule, if you ask a commercial brewer what homebrewers get wrong, their first or second criticism will be that homebrewers do not pitch enough yeast. Sure, that four month old yeast package says it’s fine to direct pitch into six gallons of 1.060 wort. And eight times out of 10 you will likely get away with it. But if you want to be a consistently good brewer, rather than occasionally making good beer, you may need to increase your pitching rate.
6. Using an Auto-siphon
It can’t really be cleaned and can entrain oxygen into your beer
Autosiphons are great .. for homebrew suppliers. They relieved them from the great burden of teaching noobs how to siphon. However, advanced brewers don’t need that crutch.
In fact, considering that I taught my then-sixth grader how to siphon and he got the hang of it in less than 10 minutes of practicing with water, noobs probably don’t need that crutch either.
Autosiphons are impossible to clean and sanitize because they have so many nooks and crannies that cannot be visually verified as clean, much less being able to reach and manually clean them. All of the interior surfaces are the ideal place for organic particles to remain behind. And if you can’t clean, then you can’t effectively sanitize.
But sanitation is not the only drawback of autosiphons. They are also notorious for malfunctioning (even when new) and entraining air into whatever you are siphoning through the Venturi Effect. A malfunctioning is basically a Venturi tube bubble generator. If it is wort, that’s probably OK because it helps slightly to oxygenate your wort. But with beer, that stream of bubbles is an unmitigated disaster.
I’ll repeat, advanced brewers shouldn’t be using autosiphons — for the few times you can’t move beer purely with gravity, just use a standard siphon action.
Author’s note: this point has gotten controversial. Obviously, there are nice stainless steel and silicone autosiphons that solve some of these problems, and there are tricks to avoid the air bubbles (like pouring sanitizer into the shell/outer tube part of the autosiphon). I took a few photos about my cleaning concerns on the autosiphon, and posted it to imgur as a pictorial explanation.
7. Yeast: Size Does Matter
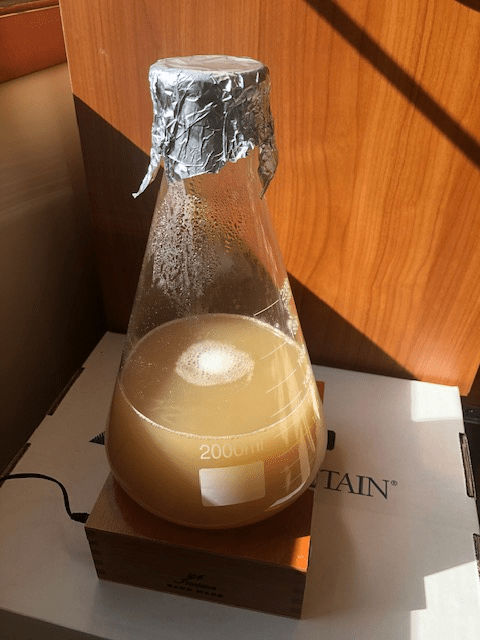
Using too small of an Erlenmeyer flask for yeast starters is a problem
The fundamental premise of using an Erlenmeyer flask to propagate yeast is that the inverted cone design and wide bottom allow you to have a large surface area so more air (oxygen) can be incorporated by the stirring. However, if you overfill an Erlenemyer flask, it’s obvious that the smaller surface area as the wort goes higher in the flask works against you. In reality, it’s best to stick to starters that are one-half of the listed volume of a flask. That means you’d use a 2L Erlenmeyer flask to make up to 1L of yeast starter, and if you need to make a 2L starter, then you probably need a 5L flask!
Or consider switching to a straight-sided jar when making medium and large starters. A 5L media bottle with a GL-45 screw cap makes a great starter vessel for stirred starters and “shaken not stirred starters”, but so do one gallon jugs with flat bottoms. Having a flat bottom (or using a ringed stir bar) helps keep the stir bar centered on the magnet.
8. Chilling: Stir It Up
If you don’t stir the wort when using an immersion chiller, you are taking a huge part of heat exchange out of the equation
One advantage of plate chillers and CFCs is that turbulence of the wort and coolant are automatically part of the process. You see, having turbulent flow of the wort and coolant are critical to efficiency transfer of heat, as compared to a static situation, which is called laminar flow. You can demonstrate this to yourself when using an immersion chiller by waiting for the point when the wort is very hot but the chiller’s effluent is cool. Stir the wort up (using a sanitized stirrer) and the effluent immediately heats up, indicating that you have been chilling inefficiently. With vigorous stirring of the wort, I am able to chill my batches to below isomerization temps in well under 2 minutes and to get to a low pitching temp in under 10 minutes. Granted, I am blessed with very cold water, but mathematically, there is no reason that furious stirring won’t get you to whatever is the best case terminal temperature given your ground water in a comparable time.
The turbulence can also be introduced using a powerful wort pump if you don’t , although no pump can move wort as vigorously as manual stirring. Another mechanical option is putting a paint stirrer attachment on a power drill and going to town.
By the way, this works for ice bath users too — except that the brewer needs to vigorously stir both the wort and ice bath, keeping the stirrers separate to keep the wort sanitary.
9. Chilling: Fetishing Plate Chillers and CFCs
Plate chillers and CFCs are not necessarily a godsend
Many advanced brewers look forward to “upgrading” to a plate chiller or counterflow chiller (CFC). To some extent, having commercial brewers use plate-type heat exchangers makes advanced brewers want to be “like a pro” and do the same. And they do have certain advantages if you don’t know how to properly use an immersion chiller (see the last item).
However, the disadvantages are also many. This is why many advanced home brewers like Jamil Zainasheff have switched back to using an immersion chiller. First of all, while the wort coming out of the plate chiller or CFC is chilled very quickly, the average amount of time it takes is usually not improved — and the second half of the wort has been sitting hot in the kettle, isomerizing hops, while it waits to pass through the chiller, which can be bad for both hoppy beers and beers that are not supposed to get too bitter. A second drawback is that it is not possible to visually inspect the inside of the chiller to make sure it is clean. If an item is not clean, it cannot be effectively sanitized. With plate chillers in particular, the prevalence of hpos and other particles being spit out even after extensive recirculation is a visual reminder of the problem. Pro plate chillers can be take apart to clean and verify, while home brew versions are brazed together. Finally, the inability to verify cleaning leads to the third problem of having to lengthen the brew day to recirculate cleaner through the plate chiller or CFC in the hope that chemicals and erosion will solve the problem of the brewer’s own making.
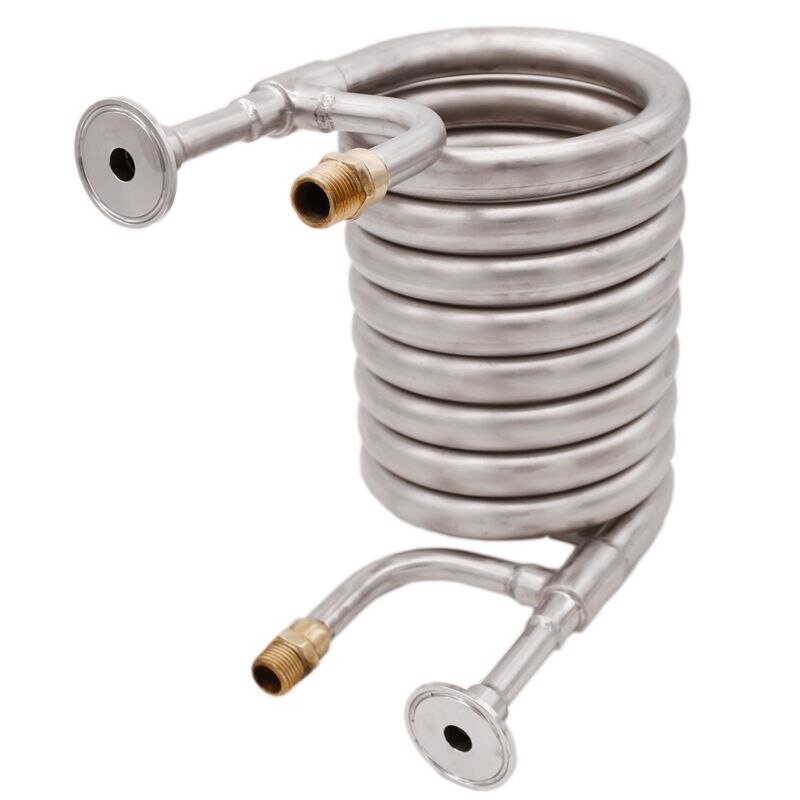
Plate chillers and counterflow chillers are no panacea for making better beer 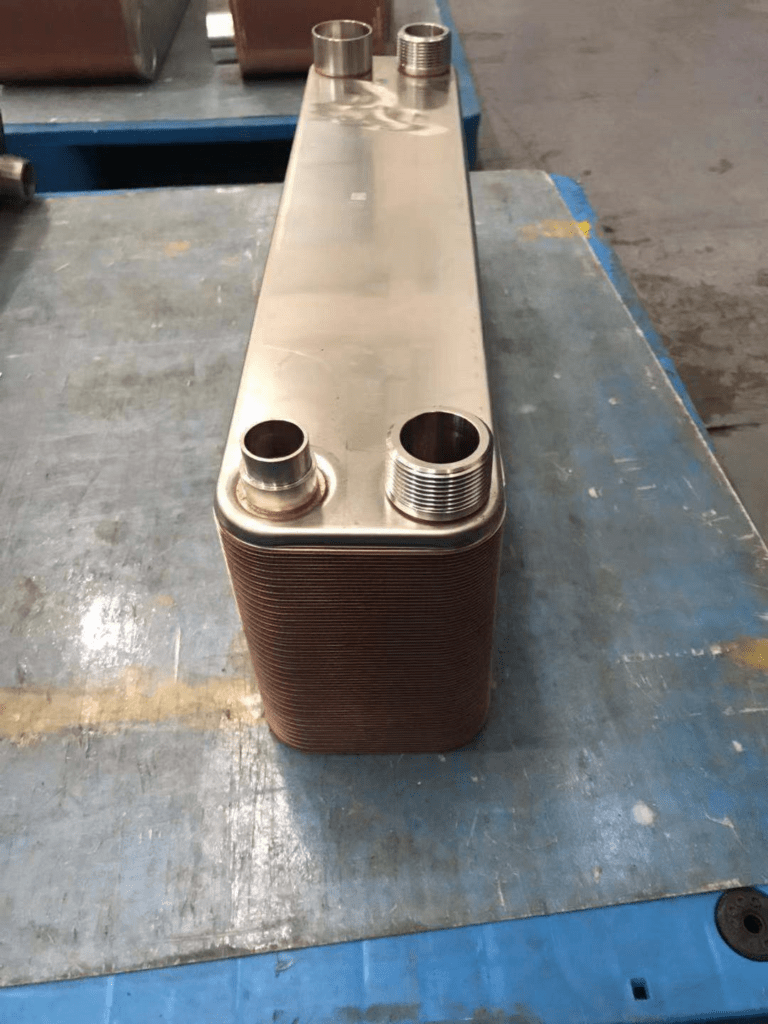
Brazed copper plate chiller sitting on a workbench
10. Going it Alone All the Time
Not brewing with other brewers if you have the opportunity is probably a big mistake
When you brew with other brewers you all gain an opportunity to learn from each other, cross-pollinate your ideas, accelerate your development as a brewer, and have more fun. Let’s be honest, after you’ve become a pretty good brewer who can consistently make quality beer, it’s hard to get any better. The amount of time, investment, and effort needed for marginal improvements is high. But if you brew with another brewer, it is likely that you’re going to learn a new thing, maybe two. This also gives you a chance to build relationships in a hobby that can become very solitary and increase your enjoyment when making beer. So this is a way to level up as a brewer while amplifying the fun of the hobby. In fact, all of these things are why pro brewers love doing “collabs” with other brewers.
Conclusion
What do you think? Am I off base on any of these? Do you have other things that even advanced brewers seem to get wrong? Let us know in the comments what you think!
Also, please let us know what you think of this feature. I have many more items that even some advanced brewers don’t know, and if you like this sort of stuff we can do another one!
Happy brewing!
One thought on “Ten Mistakes that Even Some Advanced Brewers Make”
Comments are closed.