
History, Techniques and Recipes
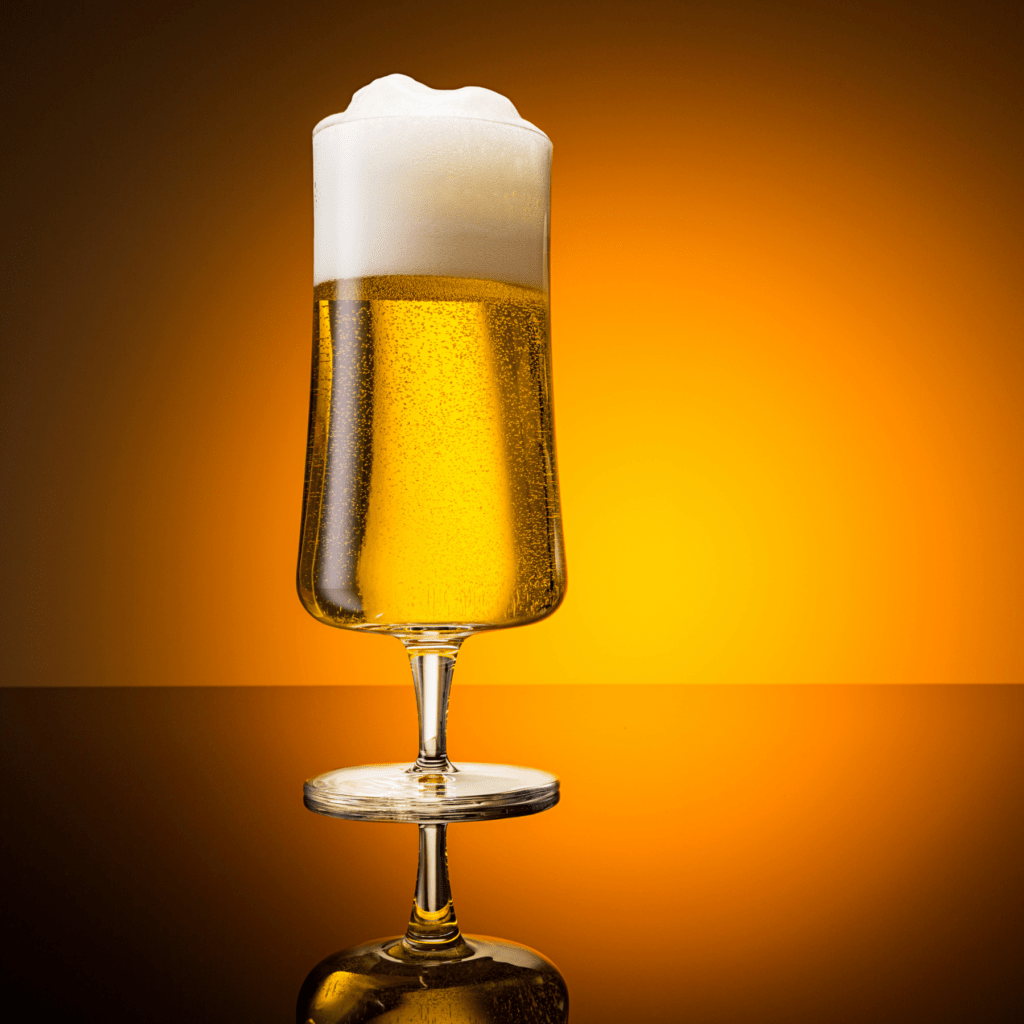
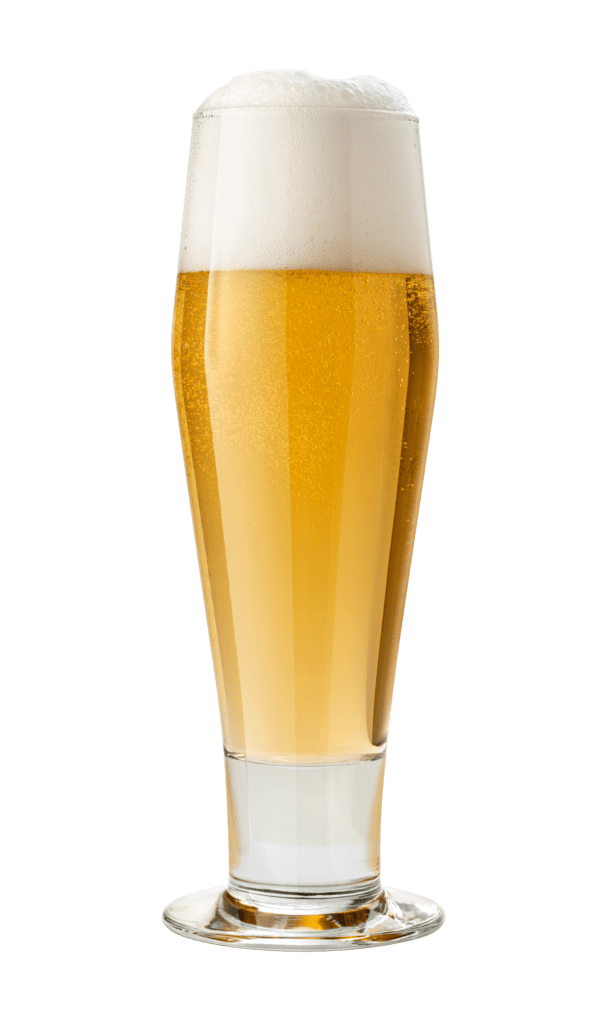
German pilsner is a marriage of simplicity and depth. Often using just a single type of hop and malt, these beers achieve a fairly wide variety of depth and flavor by using specific, high quality ingredients and multi-step mashing regimes. But the most important ingredient of all in German pilsners is time. The time for the yeast to do its work in the beer, for the flavors of the hops and malt to harmonize, and for the beer to clear up. The result is a crisp, generally hop forward beer with an unmistakable snappy cracker-malt flavor. The beauty of these beers starts even before the taste. This pale yellow beer is brilliantly clear. An army of bubbles marches toward a pillowy, white, fluffy head in the heavens above. This is truly a simple, yet sophisticated beer.
History of Early German Pilsners
German beer was pretty much dark until the mid 1800s, when advancements in kilning technologies by the British started to take hold across Europe. Josef Groll, a Bavarian born son of a brewer, is credited for brewing the first pilsner. Josef had a reputation for being quite a difficult human being to get along with, but also as a high quality brewer in Bavaria. The town burghers of Pilsen, in Bohemia, recruited Groll to brew beer for a new brewery and in 1842 he brewed the first batch of what is today known as Pilsner Urquell. This new, pale, bitter yet malty beer was unlike anything seen before, and caught on quickly. It was soon replicated across Germany and beyond.
Initially, German pilsner was very similar to Pilsner Urquell in color and taste, but over time different interpretations began to emerge. Today, you’ll usually see some reliable differences between German pilsners, Urquell and other Czech style pilsners: German versions are lighter in color. They’re usually briefly single decocted, if at all, compared to the double or triple decocted Czechs. They also don’t often use the touch of light caramel type malts that you are part of some Czech versions. Another key difference is that Czech versions almost exclusively use Czech hops such as Saaz, which have a unique floral and spice component, while the Germans use German noble hops in German pilsners.
You’ll notice that these beers will be called pils, pilsener or pilsner. The former two are a nod to the Czech practice of only calling beers brewed in Pilsen a pilsner. Nevertheless, whether it’s called German pils, pilsener or pilsner, it means the same thing.
Northern vs Southern Characteristics
If you spend some time reading about German pilsner, you’ll notice that they are often divided into Northern and Southern substyles. While many of the pilsners will have distinct, regional characteristics, which I describe below, realize that this division is a generalization, not a rule. It is similar to the distribution West Coast vs East Coast IPAs in the United States. You can find plenty of both styles in the north and south of Germany (or either coast if the U.S.A.). In fact, some German pilsners are influenced by both regional variations or don’t neatly fit into either category.

Jever, Bitburger and Warsteiner are examples of Northern style German pilsners, They tend to be more clean, use more bittering hops, incorporate slightly harder water, and have comparatively less less hop aroma.
Keesmann, Paulaner, Ketterer and Spaten are some Southern Geman interpretations, and they gravitate to a little less bitter, more aromatic, and with softer flavor profile that is a bit more balanced. These beers often emphasize Southern German hops, such as Tettnanger.
As I mentioned, some German pilsners don’t fit quite neatly into either category, including some of the most heralded pilsners. Mahr’s is a little softer and closer to Southern-style, while Rothaus’s Tannenzapfle offering is almost a mix between the two styles, with it’s clearly bready maltiness, but assertive bittering. Waldhaus is also a “tweener”, a somewhat bitter beer that also has a lot of floral and herbal flavor. And finally, Schonramer Pils is in a category of it’s own, maybe even leaning towards an Italian pils with it’s drastic (for a German pils) late hopping.
In recent years there has been a lot of noise about pilsners being less bittered in Germany than they were 20-40 years ago. The sources I’ve seen for this, such as information from the prestigious VLB Berlin brewing technology institute, cite numbers that used to be in the mid 30 IBU range in the 1970s that are now averaging the mid 20s, with the high-IBU outliers dropping slightly more. I would not worry about this much as a brewer for a couple of reasons:
- While macro lagers in Germany are generally a far better quality than those you would find in America, there are still plenty of “just OK” German pilsners sitting in grocery stores that could very well account for a good deal of this trend.
- Our focus as homebrewers should be on the better examples, which are still plenty bitter in the Northern example cases, and if we’re making a more Southern style they’ll be less bitter anyways.
An example of these two points is the Schonramer Pils, a recipe linked later on in this article. This pilsner is one of the most popular choices, if not the most popular choice, for “best German pilsner” — as rated in my super official study over the years of asking friends/brewers that have visited Germany. The recipe shows it as 42 calculated IBUs. All this is a roundabout way of saying: Don’t worry about the macro trends, focus on the specific brews that you enjoy when building a German pilsner recipe.
Recipe Building
100% German pilsner malt is a very common grist. You’ll sometimes see acidulated malt listed as a % of the malt bill. It is only for use in lowering mash PH in these beers. 5.2-5.3 is a good target for mash PH.
Step mashing has been one of the biggest keys to success in this style in my experience. I use a simple 144°F/62°C rest for 40 minutes, 160°F/71°C rest for 40 minutes and 170°F/77°C rest for 10 minutes. This helps to build a little more body and that gorgeous, puffy white head that is ever so inviting. Single decoction is fairly common in German pilsners, as well. If you want to decoct, you can remove about 1/3 of the thickest portion of the mash at the end of the 160°F/71°C rest, boil this portion for 10 minutes while stirring continuously, then add it back to reach the 3rd mash step. To my palate, decoction mashing adds a very subtle, malty flavor that can be very difficult to detect for many people. It’s OK to skip it, but I would suggest tackling a decoction at some point — ideally side by side with a non-decocted recipe — and judge for yourself.
Some brewers like to add melanoidin malt instead of doing a decoction mash. I find that melanoidin malt, even at only 3-5% of the grist, gives you a different, almost caramel-like flavor to the beer. While it can be appealing at times, it’s often distracting and heavy handed and not really a part of a true German pilsner. It’s found in a lot of recipes though, and I would suggest you ignore most of them. If you’re interested in replicating decoction-like flavors without doing a decoction, the best article I’ve seen for this has been written by the ever-creative Grand Master BJCP Judge Josh Weikert. He offers some alternatives to melanoidin malt and suggests extremely small doses to start.
You’ll generally want to shoot between 25-40 IBUs for your German pilsners. You should look to German varieties, such as Hallertau Mittelfruh, Tettnanger, Spalter and Hersbrucker to name a few. Some brewers like to bitter with German Magnum; it has a higher alpha acid percentage and it might be a little sharper than the ones named above, but it will work just fine. First wort hopping, or the act of adding hops to the brew kettle during the mash runoff, will create a smooth bitterness, and is one way to tackle this beer. Late hops should be used in moderation, or can be skipped entirely. Dry hops are not used in a German pilsner, that is one of the key differences separating it from an Italian pilsner.
German lager yeasts are appropriate here. I’m partial to the reliable, easy and clean Fermantis 34/70, a Weihenstephaner strain (liquid equivalents are WLP830, WY2124, L13 and OYL106), but there are a wide variety of German lager yeast strains. These yeasts are going to be clean and well attenuating, helping to deliver that trademark crisp, dry finish. Differences are often subtle, but noticeable to aficionados. I’ve found the Augustiner (WLP860/WY2352/L17/OYL114) and Ayinger (WLP833/WY2487/OYL111) strains to produce excellent German pilsners as well. You’ll need to pitch a great deal of yeast compared to what you’re likely used to in ales. Don’t short the pitches on these beers, especially if you’re using traditional fermentation strategies (low and slow). While a hint of matchstick-like sulfur can be appropriate in this style, some even say it’s a hallmark, underpitching/unhealthy yeast can result in inappropriate gassy sulfuric or ester character. Also note that the attenuation percentages listed by the yeast manufacturers can be conservative. I shoot for at least 80% attenuation when I brew these beers, for that trademark clean, crisp character. With step mashing, pH control and appropriately high pitch rates, you should be able to hit at least 80% attenuation.
There are several strategies for fermenting these beers. The low and slow strategy would have you fermenting in the mid 40s °F to low 50s °F (7°C-11°C) for 2-3 weeks until fermentation is completed. At that point, check for diacetyl by taking a sample, heating it up to 100°F+ (38°C) and making sure you do not smell or taste any butter type flavors. Once the beer passes that diacetyl test, slowly lower the beer down to at or near freezing temperatures and lager for a minimum of another 2 weeks. If you use finings such as biofine or gelatin, adding them towards the end of that cold lager maturation process will work well and help ensure a very clear beer.
Another popular strategy is to start the beer in the low 50s °F (7°C-11°C), and raise it to the low 60s °F (16°C-17°C) when it is 50-60% completed. 3-7 days later it should be fully fermented and you can move onto cold crashing and lagering, adding finings relatively quickly and keeping it close to freezing temps until the beer is clear, then you’re ready to carb and serve. For more details on this type of “fast-lager” method, Brulosophy has a pretty good writeup.
Krausening your beer is a traditional technique with a small cult following of brewers. The technique involves adding a small amount of early primary fermented beer to the uncarbonated beer in the keg, allowing the yeast to ferment the residual sugar, thereby producing CO2 and carbonating the the beer, Kraeusening can result in a softer mouthfeel in my experience, and is worth looking into if you want to tweak one more small thing in your beer that could put it over the edge. It’s also helpful in clearing up issues during fermentation, such as excessive diacetyl.
For your water profile, I’d recommend using Bru’n Water. It’s a free tool that is pretty easy to use. If you know your local water and it’s not too hard, filtering for chlorine and focusing on mash pH would be a good strategy. Starting with reverse osmosis (RO) or distilled water and adding salts is another effective option. My local water is reasonably soft, so I use an RV filter to remove chlorine and use acidulated malt to reduce the mash pH.
There’s a lot to digest above, I tried to cover most of the common effective strategies in this style. But if you want to keep it simple, this is what I tell most people interested in jumping into this style: Make a 100% German pilsner malt beer with around a 5.2 mash pH, use about 35 IBUs of noble German hops, with no additions after 30 minutes, use the step mash outlined above and use the low and slow fermentation technique with 34/70 yeast. You can taste the results and adjust from there, experimenting with the other strategies and techniques I outlined above to build your perfect house German pils.
Kellerpils
Kellerbier is unfiltered beer that isn’t matured as long as most lagers, it is served just after primary fermentation is completed. Kellerpils is a kellerbier of the pils variety, and it will have a fresher, more raw flavor to it than longer lagered, filtered pilsner. Stateside, the term “kellerpils” has definitely become a trendy marketing label, and I’ve found some unpredictability in what I will get when I order one. This inconsistency is similar to what occurs with American commercial brewers’ attempts at “Italian pils”, ranging from a lightly dry hopped German pils to something that would more appropriately be called an IPL or hoppy American pils. Nevertheless, there are some fun examples to be had, so give kellerpils a shot when you see it offered at a quality brewery.
If you’re interested in brewing a kellerpils yourself, it’s pretty easy to do at the homebrewing scale. Ashleigh Carter of Bierstadt Lagerhaus provided the Slow Pour Pils recipe below and told me that she would just end the fermentation process at the 40F stage in that recipe, bottle it up and serve that as kellerpils. I’ve personally done something very similar, by taking about half my pilsner batch and kegging or bottling it up early, without biofine and drinking that right away. By the time the long lagered, filtered version was ready, the kellerpils was almost gone and I not only had something to drink while waiting for that pilsner to finish lagering but I also had two different pilsners to drink together for a short time afterwards!
Modern Pilsner Recipes
Below are descriptions of and recipes inspired by three of my favorite German pilsners. You can brew them as-is, knowing you’ll have a quality recipe to lean on, or use them as a starting point and modify them to your own personal preferences.
Rothaus Pils Tannenzapfle
This is one of my favorite beers. It has a cult following, particularly on the east coast of the USA. It’s a little higher in alcohol than your typical German Pilsner, but a slightly lighter color and a wonderful balance between hop bitterness, hop flavor and malt sweetness. It only gets shipped to Denver every 6-18 months, so I set out to brew this myself back in 2019. Most of the recipe below was pieced together from public information and when I contacted the brewery they effectively confirmed it as accurate. However, they did mention that the brewing water from their spring is crystal clear and a very key component to the beer. I would look at a moderately soft water profile for this beer.
Recipe Details
Batch Size |
Boil Time |
IBU |
SRM |
Est. OG |
Est. FG |
ABV |
|---|---|---|---|---|---|---|
5 gal |
60 min |
32.6 IBUs |
2.6 SRM |
1.050 |
1.011 |
5.1 % |
Style Details
Name |
Cat. |
OG Range |
FG Range |
IBU |
SRM |
Carb |
ABV |
|---|---|---|---|---|---|---|---|
5 D |
1.044 - 1.05 |
1.008 - 1.013 |
22 - 40 |
2 - 5 |
2.5 - 3.2 |
4.4 - 5.2 % |
Fermentables
Name |
Amount |
% |
|---|---|---|
BEST Heidelberg (BESTMALZ) |
9 lbs |
100 |
Hops
Name |
Amount |
Time |
Use |
Form |
Alpha % |
|---|---|---|---|---|---|
Hallertauer Mittelfrueh |
1.5 oz |
60 min |
Boil |
Pellet |
3.4 |
Tettnang (Tettnang Tettnager) |
1 oz |
60 min |
Boil |
Pellet |
2 |
Hallertauer Mittelfrueh |
0.75 oz |
10 min |
Boil |
Pellet |
3.4 |
Tettnang (Tettnang Tettnager) |
0.75 oz |
10 min |
Boil |
Pellet |
2 |
Hallertauer Mittelfrueh |
0.75 oz |
5 min |
Boil |
Pellet |
3.4 |
Tettnang (Tettnang Tettnager) |
0.75 oz |
5 min |
Boil |
Pellet |
2 |
Yeast
Name |
Lab |
Attenuation |
Temperature |
|---|---|---|---|
Saflager Lager (W-34/70) |
DCL/Fermentis |
86% |
48°F - 59°F |
Mash
Step |
Temperature |
Time |
|---|---|---|
Saccharification |
144°F |
40 min |
Head Retention |
160°F |
40 min |
Mash Out |
169°F |
10 min |
Fermentation
Step |
Time |
Temperature |
|---|---|---|
Primary |
21 days |
49°F |
Secondary |
16 days |
49°F |
Aging |
30 days |
33°F |
Download
| Download this recipe's BeerXML file |
I primary ferment at 49F for 2-3 weeks, once diacetyl has cleared I slowly lower it down to 31F where I lager for 4-6 weeks.
Schönramer Pils
I remember the first Schönramer Pils that I had. The bottle had traveled from Germany to Colorado. It was near its best buy date, so I was skeptical. But it turned out to be one of the best pilsners I’d ever tasted. The interesting thing about this beer is that it employs more late hopping than you typically find in a German pilsner. The head brewer, Eric Toft, lived in America for almost two decades earlier in his life, but has lived in Belgium and Germany ever since. He focuses a great deal on sourcing high quality German noble hops, places value on decoction mashing under-modified malt from local farms and he also open ferments his beers. The result is a very clean, patiently fermented beer, with some incredible German hop flavors and aromas and a pleasant malt flavor that helps tie everything together. You can find the recipe for the beer here, and read more about the process and techniques at the brewery in this very interesting article.
I’ve brewed this recipe several times. I usually remove the hop stand in the recipe, but it’s perfectly fine as-is too, especially if you like a lot of hop flavor in your pilsner. I also like to use a 50-50 mix of Best Heidelberg Pils malt and Weyerman Barke Pils malt. The first time I did this was by necessity, as I was almost out of Heidelberg, but this forced pairing resulted in a little extra “something” in the malt flavor that I really enjoyed. I usually step mash it and don’t decoct it, but the single decoction works well too.
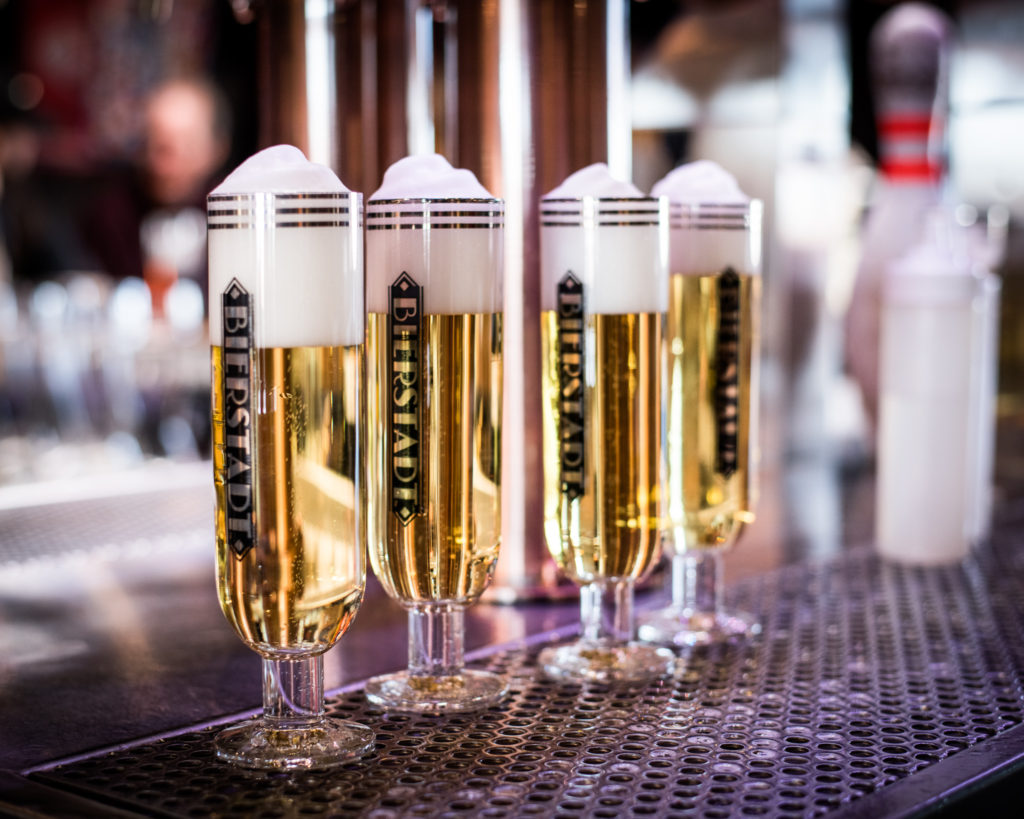
Bierstadt Lagerhaus Slow Pour Pils
Ashleigh Carter and Bill Eye opened Bierstadt Lagerhaus in 2016 in Denver, Colorado. They have a passion for lagers (they brew them exclusively) and have just three year-round beers; Helles, Dunkel and Slow Pour Pilsner. Their beer has a serious following, particularly among industry drinkers. When the World Beer Cup or Great American Beer Festival is in town, you can expect to find many brewers hanging out at their tap room for hours on end.
The recipe for Slow Pour Pils below comes straight from Ashleigh Carter. It’s a Northern-style German pilsner. There are other recipes for this beer floating around online, but some of the details are incorrect.
Recipe Details
Batch Size |
Boil Time |
IBU |
SRM |
Est. OG |
Est. FG |
ABV |
|---|---|---|---|---|---|---|
5.3 gal |
70 min |
37.3 IBUs |
3.1 SRM |
1.047 |
1.010 |
4.8 % |
Style Details
Name |
Cat. |
OG Range |
FG Range |
IBU |
SRM |
Carb |
ABV |
|---|---|---|---|---|---|---|---|
5 D |
1.044 - 1.05 |
1.008 - 1.013 |
22 - 40 |
2 - 5 |
2.5 - 3.2 |
4.4 - 5.2 % |
Fermentables
Name |
Amount |
% |
|---|---|---|
Barke Pilsner (Weyermann) |
8.75 lbs |
95.89 |
Acid Malt |
6 oz |
4.11 |
Hops
Name |
Amount |
Time |
Use |
Form |
Alpha % |
|---|---|---|---|---|---|
Hallertauer Mittelfrueh |
1 oz |
20 min |
First Wort |
Pellet |
3.6 |
Hallertauer Mittelfrueh |
2 oz |
70 min |
Boil |
Pellet |
3.6 |
Yeast
Name |
Lab |
Attenuation |
Temperature |
|---|---|---|---|
Saflager Lager (W-34/70) |
DCL/Fermentis |
86% |
48°F - 59°F |
Mash
Step |
Temperature |
Time |
|---|---|---|
Protein Rest |
131°F |
10 min |
Mash Step |
144°F |
40 min |
Mash Step |
160°F |
30 min |
Saccharification |
168°F |
10 min |
Mash Out |
168°F |
10 min |
Fermentation
Step |
Time |
Temperature |
|---|---|---|
Primary |
21 days |
49°F |
Secondary |
14 days |
49°F |
Tertiary |
7 days |
32°F |
Aging |
14 days |
33°F |
Notes
| Knockout a few degrees lower than your primary temperature, allow it to climb to 49F. If you'd like to mimic Bierstadt's use of a float tank, knockout into a fermenter, pitch your yeast and then 12 hours later transfer your beer into a new fermentation vessel, leaving behind about 1c of wort from the bottom. This helps clarify the beer and leave some of the weaker yeast behind. 49F is the suggested primary temperature for first-use yeast. Subsequent generations can be fermented at a 47F primary temperature, as they are more battle-tested. After 2 weeks in the primary, you can rack into a corny keg. Keep at 49F for another week and allow some pressure to build in the keg. After week 3, make sure your beer passes a diacetyl test (warm up a small sample and smell/taste for butter). Once it passes diacetyl, slowly lower the beer, dropping 1F every other day until you reach 40F. Leave at 40F for a week. Then slowly lower 1F per day to get to 33F. Rest here at least two weeks. After 2 weeks you may see diminished returns, but if you're patient, further resting can continue to improve the beer. *Note the ABV and IBUs listed in this recipe are a bit higher than what are listed on the label of the beer. Ashleigh shared with me that this is due to lab tested results, which come back a little lower in ABV and IBUs. She says to use the #s that I provided here, roughly 37 IBUs and a 1.047SG - 1.008FG. Brewing software may not estimate such a low final gravity, but shoot for 80%+ apparent attenuation on this recipe. |
Download
| Download this recipe's BeerXML file |
And finally, there is a fantastic course on lagers available from Bierstadt at Beer and Brewing that is well worth the price of admission (or free full trial). It details every aspect of their lagering process and holds back nothing. This rings true from my own experiences with Ashleigh and Bill, they’ve been an open book, ready and willing to share their brewing knowledge with anyone interested. I’ve also heard multiple stories from professional brewers about how Ashleigh and Bill helped them improve their own lagers, even brewers that sell beer just blocks away from Bierstadt.
Further Reading
Lager by Dave Carpenter has some good information about all types of lagers, not just German pilsner. He also has a nice article that outlines the Hochkurz mash that I often use in my pilsners.
The Electric Brewery has a nice writeup and recipe for German Pils.
Two of Joe Stange’s articles in Beer and Brewing were mentioned above in the Schonramer section (here for the story and here for the recipe). He has a number of other excellent articles as well, check out his bio page and scroll through looking for the German ones, while they’re mostly not focused on pilsner, there are many good ones about German beer.
The Oxford Companion definition of German Pilsner has some more interesting historical details on the style.
Josh Weikert’s article on using a soft hand when looking at decoction alternatives was mentioned in the recipe building section.
You mentioned pitching enough yeast (I agree) but what is your practice? Do you ever pitch dry yeast without rehydration, and if so, how many packets in a 5 gallon batch? Thanks!
Hey Drew,
With the low and slow fermentation method that I outlined above, I go with 3 packs of 34/70 for a 5 gallon batch. With the warmer, faster method, 2 should work fine. When in doubt, I use the Brewer’s Friend calculator for pitches, but I’m sure Beersmith and Brewfather do a good enough job too. I do tend to subscribe to “when in doubt, pitch more” with big beers and low temp lagers, as they are very susceptible to off flavors when fermentation conditions/yeast health is not on point.
Regarding rehydration, I believe it is 100% unnecessary. Fermentis did a study a few years back that basically showed it is not necessary at all. I no longer do it for my fermentis dry yeast. Here’s some of the info https://fermentis.com/en/news-from-fermentis/technical-reviews/e2u-direct-pitching/
Let me know if you have any other questions. Cheers!